")
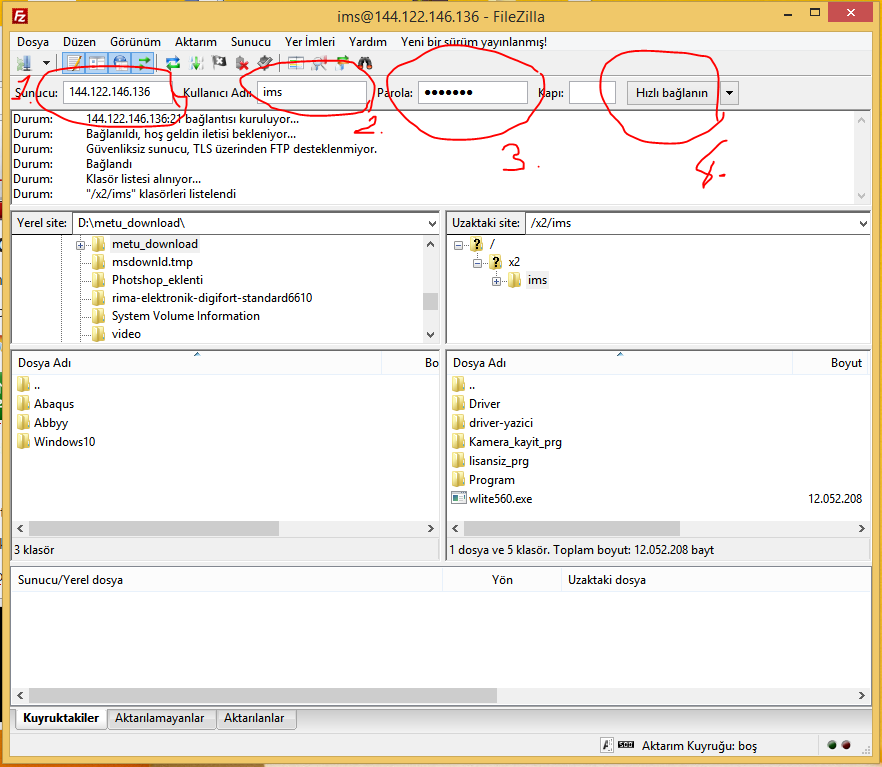
How to use FTP
Installing on Windows
With installer version
Please note: All screenshots are from Windows 8. Yours may look different, but the functionality is the same.
Make sure that the user account which is being used for the installation has administrative rights that allow the installation of software.
Possible Confirmation prompts
Depending on OS settings and version, it is possible that one or both of the following confirmation prompts appear:


License agreement
Hopefully you should now see the following window where you will have to accept the terms of the license agreement to continue. Read through it and click "I Agree" if you do.

Installing for me or all users?
You will now have to decide if you want to install only for your user account or if FileZilla should be accessible by every user on the machine. This mainly affects where the Start Menu icons are placed. Installing for all users needs administrative privileges, and every user will have his/her own settings.

Choosing components
Next you need to choose which parts of the FileZilla client you want to install. If you hover your mouse over a choice, FileZilla will show you a description of the item. Here is the window:

Go through all of them and just check/uncheck the stuff you want. Select additional languages if you want FileZilla in another language than English. Icon sets let you choose different looks for FileZilla's icons (they are partly user contributed). The shell extension integrates FileZilla into the Windows Explorer. Most users will go with what's selected by default here. When you're all finished, click Next.
Two small notes regarding the shell extension:
1. Installing or removing requires full administrative privileges.
2. Though FileZilla for Windows is only available as 32bit build, it contains a shell extension for both the 32bit and 64bit shell.
Install location
The next window will ask you where to install the program. If you don't have any special needs, click Next.

The default path is to install into your "Program Files" directory on 32bit Windows, and into "Program Files (x86)" on 64bit Windows. Please, if you are migrating from FileZilla 2, do NEVER, EVER install into the same directory as FileZilla 2! FileZilla 3 is not an upgrade to FileZilla 2, and merging both directories creates a mess.
Here, you will be asked what you want to name the folder with the shortcuts to FileZilla inside. The default name "FileZilla FTP Client" should be good for most people. You can also choose not to install these shortcuts.

Note to Windows 8 users: In Windows 8, MS has removed the Start Menu, but if you install the one from ClassicShell you will get your Start menu icons back.
Finishing installation
When you click Install, FileZilla will get installed.

If no errors occur it should complete in some seconds.

When it's done, click Next to finish the installation.

Congratulations, you've now successfully installed the FileZilla Client and can now move on to running!
Windows Vista/7/8 users: Note that if you select to start FileZilla from the installer, it inherits the installer permissions. In other words, it starts elevated from the installer, while from the Start Menu it does not. Basically, elevation does have influence on how the shell extension works and which directories are writable. Many users have posted into the forum why something works directly after installation, but fails later on. Now you know a possible cause.